Monday, June 17, 2013

Awakening


 I thought it would be fun to try a different swirl technique.  Normally the molds I use are nice log molds.  And I think I make some very pretty soaps with them.  But I wanted to try a very colorful  "Column Swirl" technique.  And I couldn't do them in my regular log molds.

For a Column Swirl you need a slab mold.  I don't own a slab mold yet.  So I found a sturdy box and lined it with plastic.  I put a small jar in the center of the box

I made my soap as normal and scented it with a blend of essential oils and fragrance oils.  Then I divided the soaps into 4 parts.  I colored  three of the parts in bright colors, and left the fourth portion white.
 

I alternated pouring the colors straight onto the center of the jar.  The colors stayed in rings!  And as the next color was poured, the colors were pushed out in nice clean circles.  It was somehow very satisfying to pour colors on the jar, have the raw soap go smoothly down the side of the jar, and make nice neat even(ish) circles.
 I tried to keep a pattern to how I poured the colors.  But I often messed up and poured the wrong color at the wrong time.  I don't think it hurt the design at all. I kept pouring till I had the box as deep as I wanted the soaps to be.  Luckily I had figured the size of the batch just perfectly for this box, and had just enough soap to have a perfectly sized large bars.


After all the soap was poured, I carefully pulled the jar out of the box. I then drizzled in the little bits of the color that was left in my color bowls into the center, trying to keep the colors as unmixed as possible.  

 Now for the fun part!  I took a chopstick and ran it through the soap in lines from the center, and then from the outside going to the center.  It was really cool to see the soap turn into such a pretty star-burst design as I did this.


I could look at this design in this box all day.
The final product was beautiful.  I love how the star-burst design goes all the way through the soap. The fragrance is a blend of White Tea fragrance oil, with essential oils of Bergamont, Lavender Mandarin, Thyme, Orange and Ylang Ylang.  It's like a watching a sunrise from your garden .  These are available right now at Sego Lily Soap.  These bars are big and beautiful!  Even bigger than my normal bars, which are already big to begin with.  I think I love these soaps!

Monday, January 7, 2013

Sea Salt Soaps

Sea Salt soaps are different than regular soaps.  They include a healthy portion of sea salts right in with the soap.  It's almost 50% salt and 50% soap.  It's kind of like showering with bath salts!  Sea salts are healthy for your skin.  It is said they add moisture, draw away toxins and exfoliate your skin.  You will be smooth and refreshed after using a salt bar.

Sea salt bars are made differently than regular soaps.  Since salts inhibit lather, these bars are formulated with a high percentage of coconut oil.  Coconut oil is a staple of almost all handmade soaps.  Coconut oil is the oil that adds the fluffy lather to soaps.   Coconut oil soap will even lather even in sea water.  Since coconut oil cleans so well, that it can be a little drying if used at a high rate.  To counteract the possible drying, these soaps also have a very high percentage of Shea Butter, much higher than any other bar I make.  Also, these bars are superfatted at a higher rate.  This means that there is more free coconut oil and shea butter that has not been turned into soap.  These free oils act as moisturizers to your skin.  

I think my favorite part of our salt bars is that we use mineral rich salts left over from Ancient Lake Bonneville!  Our Great Salt Lake, similar to the Dead Sea in Isreal, is also an inbound sea.  It was formed at the end of the ice age when the waters of Ancient Lake Bonneville began to recede.  This massive prehistoric sea covered 2/3 of Utah, and was 1000 feet deep where our salt flats are now.  As it receded  it left us mineral rich salts to enjoy!

A sea salt bar is a very hard bar.  It will last longer than other soaps.  The bumpy texture our salt bars have is from the medium crystals we use.  The bars will seem a bit crumbly with the first use, but will smooth out.  The bar is not scratchy to use.  Salt bars get smooth with use.  I love to use my salt bars with a nylon mesh pouf to get maximum bubbles.  The bubbles are creamy and luxurious.  But my husband prefers to use his straight off the bar with no pouf.  Either way it does lather and will smooth and refresh your skin.  I recommend using a salt bar about once a week to refresh and exfoliate your skin.  But even with my super sensitive skin, I can use them a few times a week.  I love salt bars! 


Thursday, December 27, 2012

New Use for Log Molds

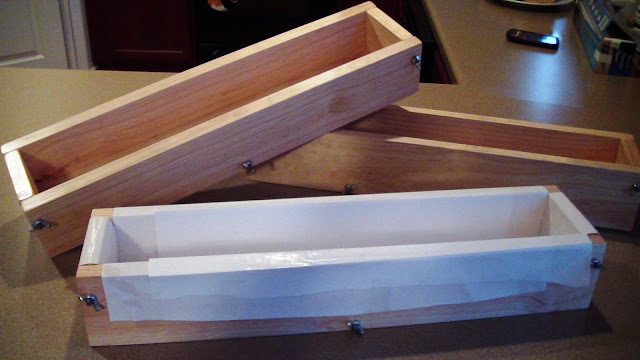
Yes, this is not soap related, but it does use my awesome soap molds!  These are the beautiful log molds my husband made for me this summer.  They are very handy, and get lots of use, since I make soap with them once or twice a week.  My stepson Drew found a new use for them that I would have never thought of.
This year my husband's family decided to draw names and do handmade gifts for each other.  Drew is a wiz in the kitchen.  He can cook and he can bake. So he decided to make his big brother a giant Kit Kat candy bar for Christmas.  He melted chocolate in a double boiler, and used my cleaned soap mold as the mold.  First he lined it with lots of freezer paper.

Drew and his dad, making giant chocolate bars in my soap mold.  


A few of us thought that Drew had an overabundance of chocolate bars.  That was clever planning on his part.  He wanted extra bars for Christmas gifts for his friends.


                                                                                    Notice the Kit Kat logo.  It was printed off and then traced onto one of my plastic cutting sheet.  He cut it out, and had the plastic logo shape on the bottom of the mold in the center.  It was so the giant bar would have the logo embossed in the top, just like a real candy bar.  It was a pretty cool touch.  And looked pretty impressive when the bar was unmolded.


The wafer cookies and chocolate were alternated till the mold was full, then a final layer of chocolate was put on top.


Drew made two of these huge bars, wrapped each in foil, and then packaged it in a red paper wrapper with the Kit Kat logo on top.
This is the finished product on Christmas day.  Drew had the two bars, side by side in a very realistic looking red paper wrapper.  I wish my picture did it justice.  But I was using a cell phone, since my camera got lost just before Christmas.  (Terrible timing.)  But it looked amazing!  


We were lucky enough to get half of the chocolate bars.  So now we have enough chocolate and cookie wafer to choke a horse.  So if anyone wants some, drop on by.  We've got enough for the whole neighborhood!

Wednesday, December 12, 2012

Seeing Pink (Peppermint)


Have you ever seen so many beautiful pink soaps?  This was a special order for a Relief Society church group.  They are Peppermint Sticks soaps for Christmas!  It was very fun to make so many pretty little soaps.  In all it was about 3 of the largest batches I have ever made.  We graduated from making soap in a big pot, to making soap in a huge bucket.  The whole kitchen smelled like sweet peppermint.  

They make great building blocks for teens to make fortresses with.  
They are also handy for making portraits.

But usually, we keep them neatly in bins.  
I loved how they turned out with the customized labels.  And I liked how the swirls came out on these also.  The recipe we used is a favorite that turns out a smooth bar that produces lots of fluffy bubbles.  And of course they are super gentle for all skin types.  We made these at a very special price.  So if you know of a church group, or other non-profit group that could use some nice soaps as Christmas or Mother's Day gifts, give us a call.  We can make a few batches customized just for you!


Thursday, November 15, 2012

Frankincense Swirl Soap

Frankincense Swirl Soap


Take a look at my newest adventure.  This is a very special soap for Christmas.  It is Frankincense Swirl soap.  This is not my normal soap.  Usually I do what is called Cold Process soapmaking.  With cold process Soapmaking, you melt oils, add lye water, and stir it till it starts a chemical reaction called Saponification.   Then the soap has to cure for about a month or more before you can use it.  For this Frankincense soap, I wanted to try incorporating Melt and Pour soap in my normal Cold Process soap batch. I was actually thinking of a special way to make this soap and was wondering if melt and pour would work in cold process soap.  I liked the idea of the melt and pour looking like actual Frankincense resin.  Then I saw this blog post from Amy from Great Cakes Soapworks and thought I'd give it a try.  

Melt and Pour soaps are completely different from regular cold process soaps.  They are usually the very pretty soaps that are see through or translucent.  You can buy it unscented and uncolored in a large chunk, chop it up, melt it in a microwave, add some color and fragrance, then put it in a mold to harden.  As soon as it is solid again, you can use it.  My grandkids love to make Melt and Pour soaps.  It is a fun and safe for kids to do with adult supervision.  And they love the creative aspect of choosing their own colors and scents.  They often put so many sparkles and glitter in their soap, that it is scratchy to use. But they are always very proud of their melt and pour creations.  

Me making the Cold Process portion of soap.
I like Melt and Pour.  I like it because it is pretty and fun to do with my grandkids.  But my skin prefers the benefits of a good old fashioned cold process soap.  So that is why I normally only make traditional cold process soap.  I think it is healthiest soap available.  For this soap though, I wanted to try using melt and pour soap as a decorative element in my normal cold process soap.

Mixing in Colorant
I added a touch of warm red mica to the entire scented batch, then seperated out a little bit of raw soap and added more.  I wanted some darker swirls of this lovely color.

This may be a good time to mention, that if you ever decide to try melt and pour soap, It is a good idea to not buy it at the craft store.  The craft store melt and pour soaps are full of detergents and not very good for your skin. Get your melt and pour soaps from a reputable soap making supply company.  Look online and you will find some good options.  I like Majestic Mountain Sage in Nibley, Pine Meadows in Provo, or Bramble Berry in Washington state.

Raw Cold Process Soap and melted Melt and Pour soap

 The melt and pour soap is in the container on the right.  It melts at a higher temperature than the cold process soap is made at.  I was wondering how the temperature differences would affect the melt and pour soap.  I was worried the cooler temperature of the cold process soap would harden the melt and pour soap before I had time to make it all pretty in the mold.

Layering the melt and pour soap over the cold process soap
I really had no idea of what to expect.  So I just started layering.  
More Layering 
I did many layers, and then swirled it with a bent wire hanger a few times.  It felt strange because the melt and pour was much harder than the cold process soap, and wanted to stick to the hanger.  I was a bit nervous that I had messed up the layering and left all the melt and pour glumped together.  So I left it at that, and finished it off with just the cold process soaps on top.  

Notice, I do not have a nice picture of the finished soap in the log mold.  My very hot and handy photographer (my husband) had to stop taking pictures for a bit and help me with a soaping emergency.  This Frankincense soap was only half of the soap batch I was making.  The other half was a super yummy smelling Allspice soap I was trying to make.  I forgot the Allspice fragrance oil is a fast mover and started seizing up in the pot!!  We had to frantically glop it and beat it into a mold before it was too hard to do anything with.  By the time we got it in, we forgot about taking a picture of the lovely swirling I had done on top of the Frankincense soap. So I will just show you another picture of the finished product.
 This was a fun experiment.  I think I will occasionally use Melt and Pour soap as a decorative element in my Cold Process soap from time to time.

Wednesday, November 14, 2012

This last weekend we had a booth at the Cat Fancier's Association's Fall Show.  It was our first booth. I learned a lot about running a booth promoting my product.  It was totally worth the lack of sleeping in for the weekend.  And I even learned about cats.

Monday, October 29, 2012

Soap and Washcloth in One!


Look at what my soapmaking Friend Cheryl sent me!  These are felted soaps.  They are like a soap and a washcloth in one.  I have just discovered these recently.  And now I must learn to make them.  They are lovely soaps, surrounded with something called roving wool.  As you lather the soaps, the wool tightens around the soap.  It shrinks down as the soap get's smaller.  


I had a very hard time getting myself to use one.  But since that is actually a pet peeve of mine (When people won't use my soap, because it is too pretty.)  So I got brave and am using it. It is lovely.  The wool is soft, and feels like a washcloth.  And the lather is creamy and smooth.  

I hear the soap will last longer wrapped in wool.  And I am told that the wool is naturally anti-microbial, or something else like that.  I need to do more research.  But I can say I love using them.  They gently exfoliate and leave my skin smooth and clean.  

I must learn to do this, after the holidays!